

Remove a Person’s Reflection from a Window Photo
ClearRemover ·
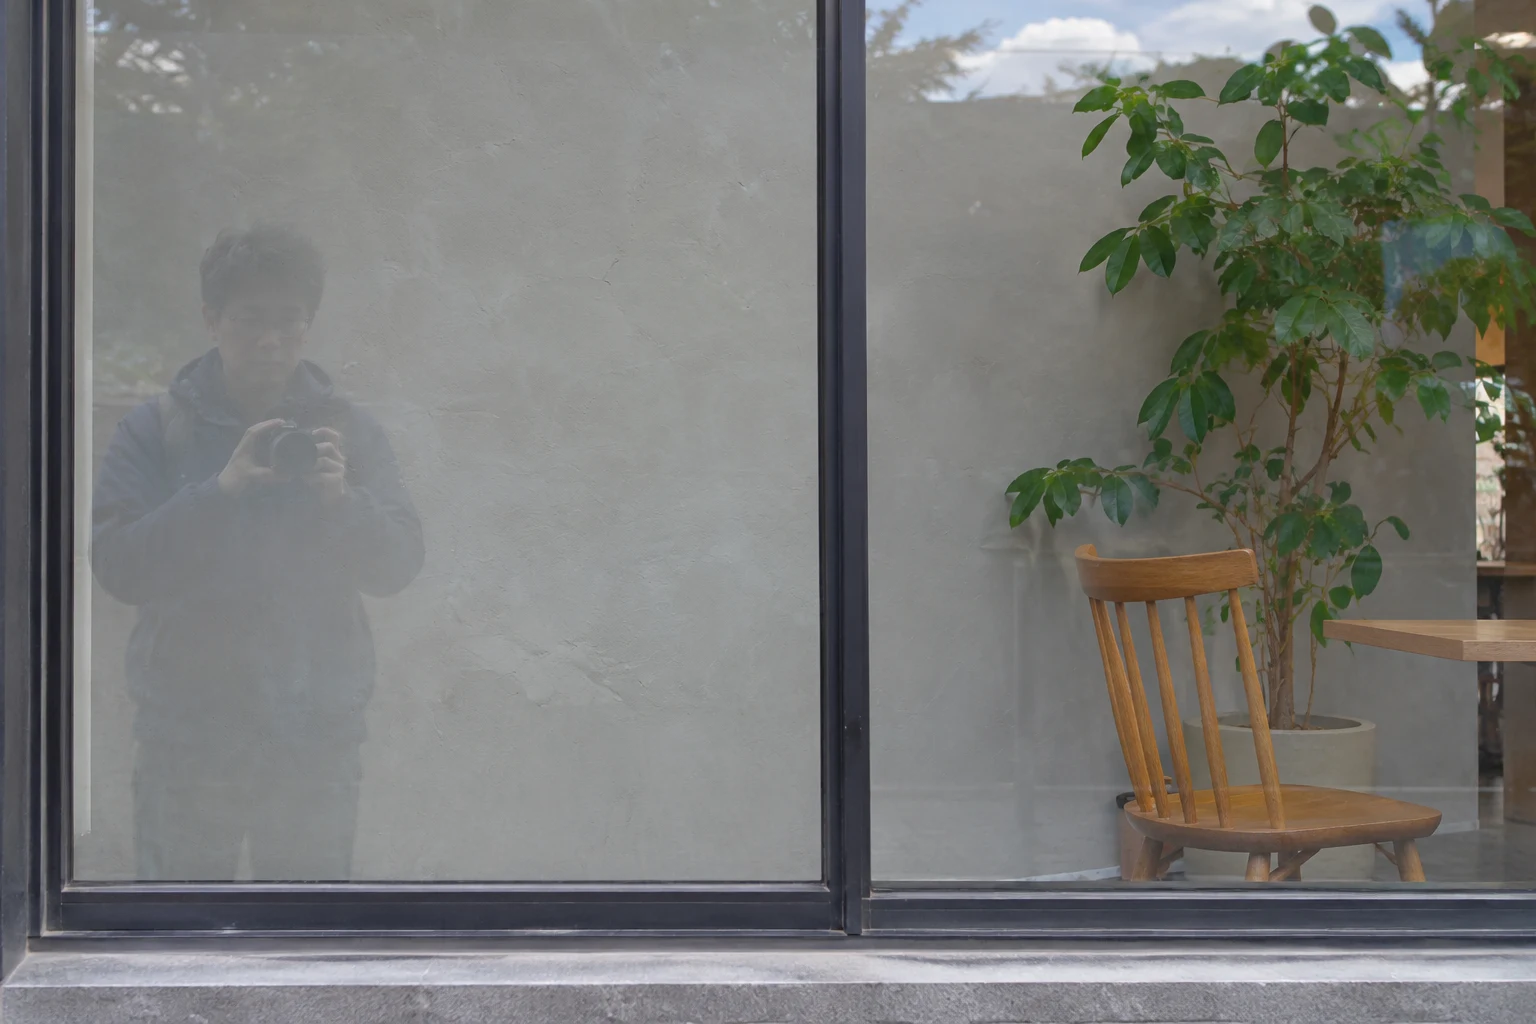
Before
After
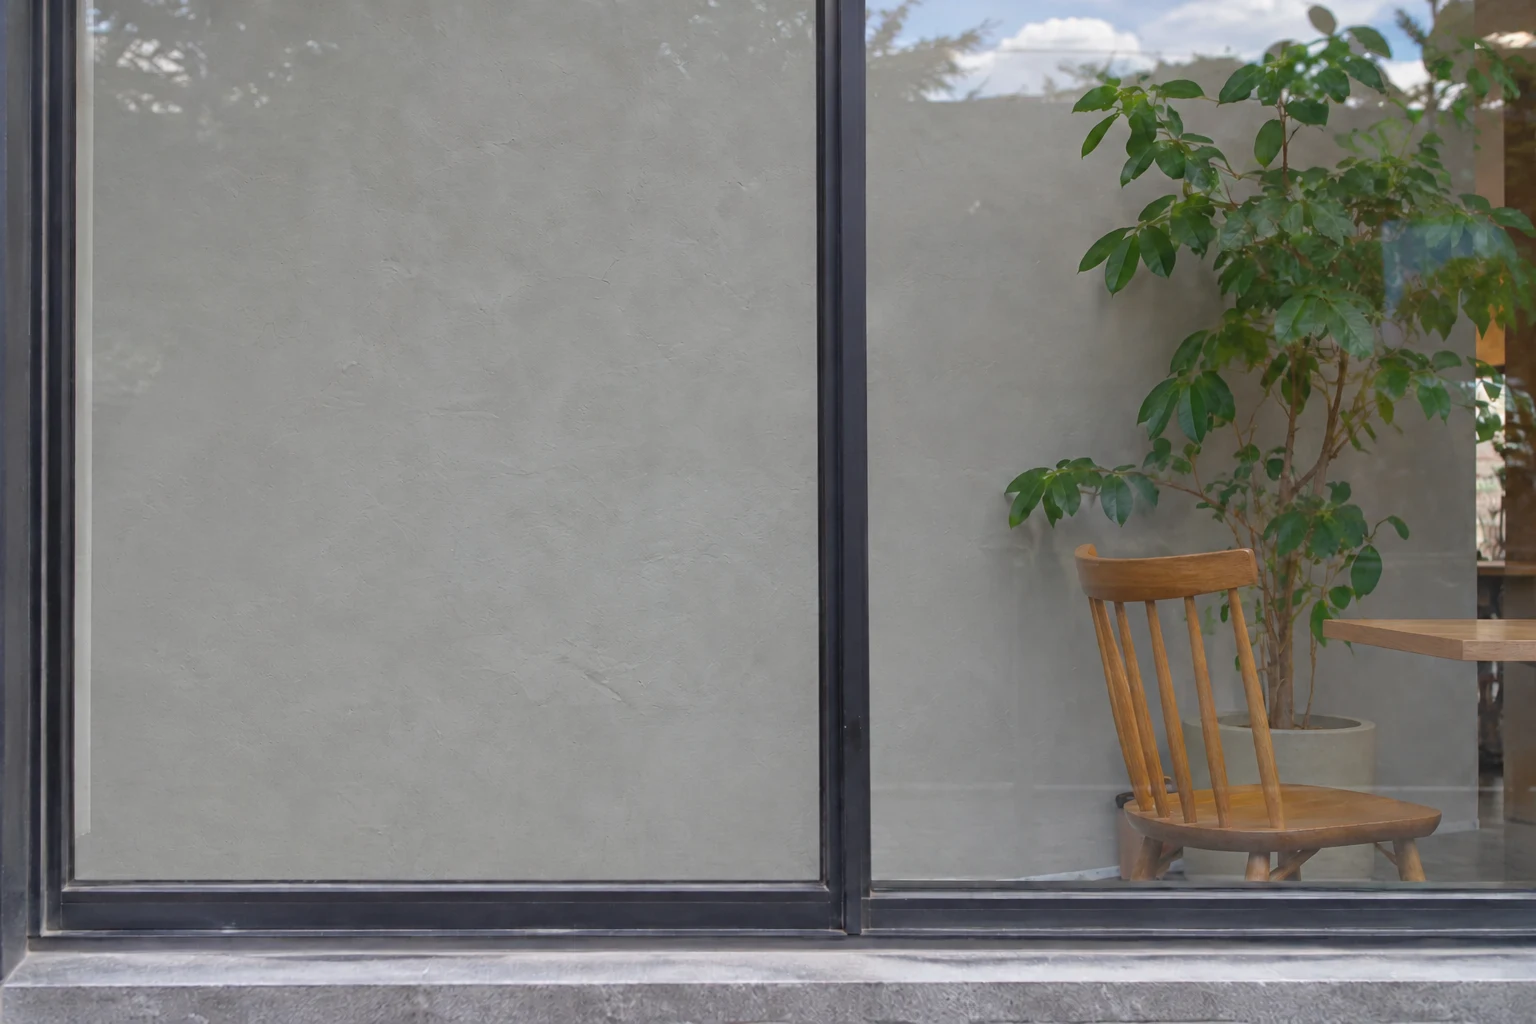
To remove a person's reflection from a window photo, first check what shows through the reflected figure. A small reflection over a plain wall is a candidate for local cleanup. A face, sign or room full of objects showing through it needs a different approach: brushing over the reflection can replace those details too.
ClearRemover lets you mark an area for generated fill. It does not have a dedicated glass-reflection separator. Use it for a localized distraction when a plausible replacement is acceptable, rather than expecting it to extract an untouched scene from behind the glass.
Check the reflection before marking it
Follow the reflected person's outline, camera and hands. Look through that outline at the scene on the other side of the window. What would you lose if that whole patch were reconstructed?
In the generated comparison above, the photographer overlaps a plain gray wall. The chair and plant sit outside that area. The example shows the intended selection boundary; it is not a ClearRemover test. Some reflected sky and foliage remain because the aim is to remove one distracting figure, rather than make the window disappear.
| What the photo contains | A useful next step |
|---|---|
| Small figure over a plain wall or other simple surface | Try a tight local selection, then inspect the texture. |
| Reflection crossing lettering, a face or a detailed object | Find another frame or use a reflection-specific editor; exact detail matters here. |
| A faint second scene spread across most of the window | Try reflection separation before doing local retouching. |
| An actual person standing behind the glass | Treat this as person removal; they are part of the scene, not a reflected overlay. |
Adobe's explanation of window reflections describes the photograph as a mixture of the view through the glass and the reflected view. That explains why a transparent figure is harder to remove faithfully than an isolated object against a wall: both views contribute to the same pixels.
Brush out a localized figure
Open the object remover with a copy of the original. ClearRemover accepts JPG, PNG and WebP files up to 20 MB. Convert a RAW file to a supported format first and keep the RAW original for other editing options.
- Choose Objects. The brush marks the patch to reconstruct. There is no automatic reflection detector or reflection-strength slider.
- Use a small Brush size around the outline. Cover the reflected head, clothing, hands and camera, including faint edges that would otherwise leave a ghost silhouette. Several strokes can be painted before one Erase run.
- Keep the window structure outside the selection. Avoid the black mullion, sill, chair and plant in this example. Where the reflection touches a frame, trace that boundary carefully instead of marking a wide strip across it. Undo an accidental stroke and repaint it.
- Review what lies inside the marked patch. A wall visible through the jacket will also be subject to reconstruction. If the patch includes a sign or someone's face, reconsider the method before processing.
- Press Erase and compare with the original. Look at the old outline and the repaired wall first. Then check the nearby frame and the rest of the interior.
Background removal serves a different task: it creates a cutout. It won't preserve a window scene while selectively separating the reflected photographer from it.
Check for a ghost outline and a painted wall
View the downloaded file at its actual pixel size. Check the head and shoulders for a dark fringe, the camera for a leftover shape, and the lower edge of the figure for a soft vertical streak. A reflection can be faint enough that a missed sleeve looks like a change in wall lighting.
Inspect the fill itself. Plaster should not suddenly become smooth, repeated texture should not form an obvious patch, and straight window edges should stay straight. Keep some natural reflection where it belongs; removing every highlight can make the glass look inconsistent.
If the result changes a frame edge or loses important detail, restart from the original with a corrected selection. Each processing run can consume another free edit or credits. Repeatedly filling an already damaged result won't recover the original scene. The guide to removing a sticker and checking for an original explains the same limit on treating generated pixels as recovered evidence.
When the reflection covers the whole window
For a broad overlay, use a tool designed to separate reflections. Lightroom's current reflection-removal instructions describe automatic detection and an Amount control, and recommend applying reflection removal before other edits. Those controls are separate from ClearRemover's local brush workflow.
Compare any separated result with the source, especially where the two scenes overlap. If you can take the photo again, change your position and check the preview for your own outline before shooting. A clearer source is preferable when the interior's exact lettering or objects must remain faithful.
Output size and edit allowance
ClearRemover resizes inputs larger than 2048 px on the longest side before processing. Standard results download as JPG, up to 1024 px on the longest side. This selective eraser does not preserve PNG transparency.
HD uses 2K processing and downloads the full generated result for 2 credits per erase. It does not guarantee the original dimensions or exact scene detail. Additional Standard erases cost 1 credit.
The daily free allowance is one Standard edit without an account and one additional Standard edit after Google sign-in, subject to availability. It is shared with background removal and resets at 00:00 UTC. Check current pricing before making several attempts.