

White Outline After Removing a Background?
ClearRemover ·
White-fringe reference

Clean-edge reference

A white outline after removing a background can come from pale pixels left around the subject. The surrounding area may already be transparent. Putting that cutout on a dark background exposes the edge; saving it as PNG again does not change those pixels.
First check the downloaded file over both a light and a dark surface. If the problem is a complete white rectangle rather than a narrow rim, follow the PNG white-background checks instead.
Compare two files with the same transparency
The two blue-circle references above have the same shape, pixel dimensions and transparency values. In one file, the partly transparent edge pixels also contain white. In the other, they retain the circle's blue color. The opaque center is identical.
Download the actual transparent files:
Both were constructed for this diagnosis. The clean reference was defined separately; it was not repaired by ClearRemover or another background remover. Their soft edge is deliberately wide enough to inspect. These files demonstrate a color-and-transparency difference, not a measured photo-editing result.
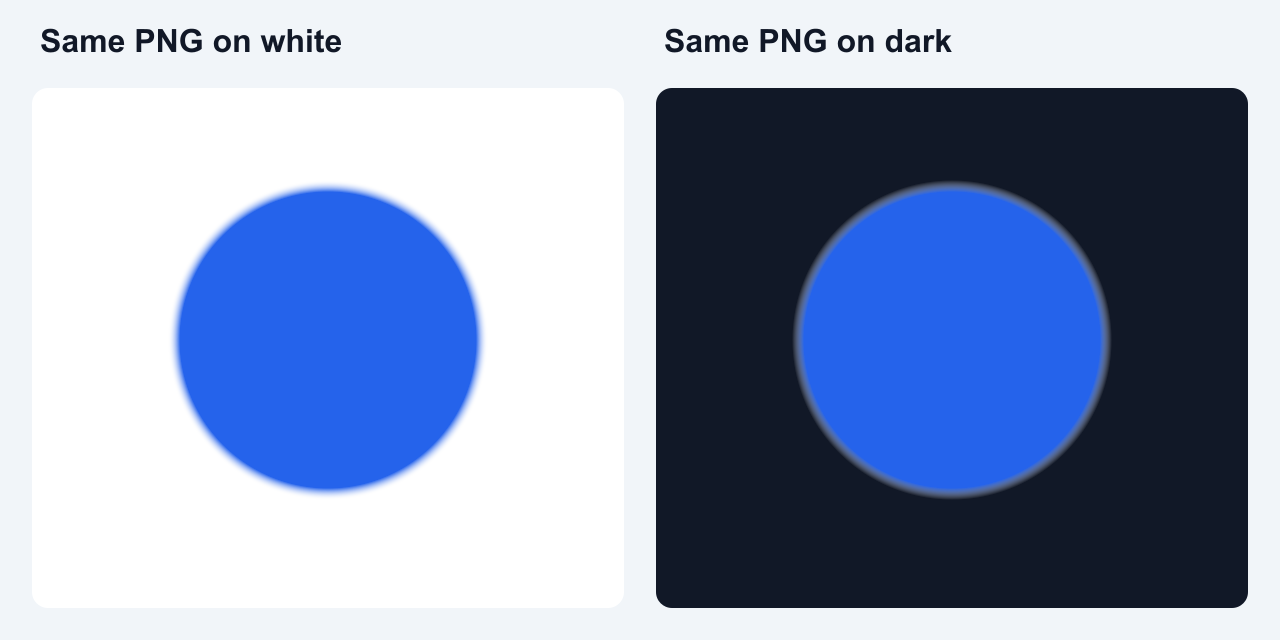
The preview above places the unchanged white-fringe PNG over two surfaces. The pale rim is harder to distinguish on white. The surfaces are baked into this explanatory preview; use the two downloadable PNGs to test transparency in your own editor.
Check where the rim first appears
- Place the downloaded cutout above a dark solid layer. Use the image file, not a screenshot of its checkerboard preview. Then change the solid layer to white or another light color.
- Inspect at actual pixel size and at the intended display size. A tightly zoomed edge helps locate stray pixels; the final display size tells you whether they affect the design. Keep the scale consistent when comparing versions.
- Try the clean reference in the same destination. If your cutout has a rim and the reference does not, the cutout needs closer inspection. If both develop an unexpected border, check for an outline effect, shadow or conversion step in that destination.
- Compare with the original subject. A white seam, light fur or reflected light may belong to the object. Removing every bright pixel can damage real detail.
Keep the original, the downloaded cutout and any corrected copy separately. That lets you tell whether the fringe was present after removal or introduced by a later export.
Choose a correction that matches the edge
A leftover strip of fully opaque background and a pale, partly transparent edge require different corrections.
For a solid strip outside a firm object boundary, refine the selection or layer mask locally. A small inward adjustment can remove remaining background, but stop if it trims the actual object. Thin straps, hair and fur need more care than a hard product edge.
For a soft white-contaminated fringe, investigate edge-color correction as well as the mask. Adobe's fringe-pixel documentation describes tools such as color decontamination, defringing and white-matte removal. They address color left near a selection boundary. Availability and the appropriate command depend on your editor and image; this guide does not claim a tested Photoshop repair.
Keep any correction narrow and compare against the original. Increasing feathering spreads the transition over more pixels; it does not by itself replace white-contaminated colors. Cutting farther into a soft edge can hide a halo by deleting useful foreground detail.
For simple artwork on a known solid color, a color-to-alpha operation may be useful. The GIMP manual explains that this changes both color and transparency according to similarity to the selected color. It can also make wanted light areas partly transparent. Protect white lettering and pale parts of the subject rather than applying it indiscriminately to a whole photograph.
What ClearRemover currently provides
The transparent background maker automatically separates a subject from a photo. It does not currently expose a restore brush, a refine-edge mask or a white-matte removal control. A fresh removal may produce a different boundary, but another run is not a guaranteed halo correction.
Use the original photo when starting again. The current upload preparation fills a white canvas, draws the input onto it and encodes it as JPEG before cloud processing. Uploading an existing transparent cutout therefore does not preserve its alpha channel for manual refinement.
Accepted inputs are JPG, PNG and WebP up to 20 MB. Large inputs are reduced to at most 2048 pixels on the longest side before processing. The background-removal download is transparent PNG, capped at 1024 pixels on the longest side; this tool has no HD option. The resolution guide explains why preview size, saved dimensions and file size are separate checks.
The shared Standard allowance is one daily edit without an account and one additional daily edit after Google sign-in, subject to availability. It resets at 00:00 UTC and is shared with selective erasing. Additional Standard background removals cost 1 credit; see current pricing. The diagnostic files in this article do not require a processing run.
Once you have corrected an edge, export a transparent PNG and reopen that saved copy over the intended background. Check the subject's thin details as well as the rim before replacing the working file in your design.